Do you want to make a spiral deco mesh wreath but aren’t sure where to begin?
Well, you’ve come to the right place.
I’ll not only share a step-by-step tutorial, but I’ll share an image of each step, so you can see exactly how it should look.
Just so you know, we are going to make a curly mesh wreath (also known as a spiral mesh wreath). So, if this is exactly what you want to make, keep reading.
Here’s an overview –
First, we’ll talk about materials. Then we’ll get into the nitty gritty, which are all of the steps to make the wreath. Finally, we’ll talk about the finishing touches.
For a fun, yet inexpensive project, you can pick up most of these items at your local Dollar Tree. I’ve certainly made some really cute wreaths just using what I’ve found there.
For better quality mesh and a larger color selection, check your local craft store. I’ve gotten deco mesh at Hobby Lobby, and Michaels too!

MATERIALS
This post contains affiliate links. If you make a purchase using one of these links, I could earn a small fee, at no additional cost to you.
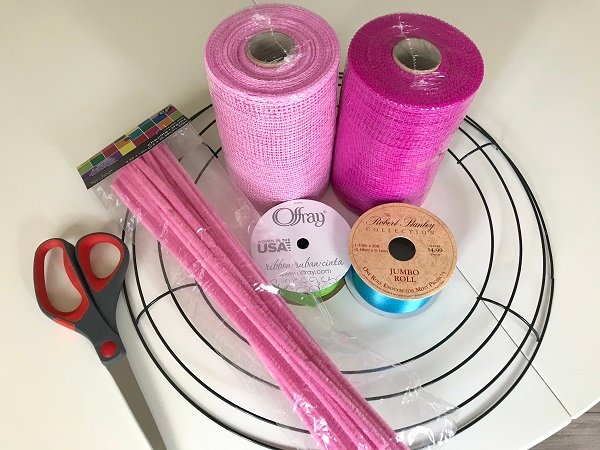
- Metal Wreath Ring, 14″. This is sometimes called a wire wreath form.
- Chenille Stems, 1 pack. Ideally, you want them to match the color of your ribbon. If you can’t find chenille stems to match your ribbon, choose a color that matches your deco mesh.
- Deco Mesh, 5 1/2″ – This project needs 40 total yards of mesh, so you’ll need four 10-yard rolls of mesh in whatever color you want. For the Poppy wreath, I used two different colors: light pink, and dark pink. I used each entire roll of mesh.
- Grosgrain Ribbon, 1″. Using different ribbon widths, like 1.5″ and 2.5″, gives your wreath a cuter look. For the Poppy wreath, I used the same width of ribbon in two different colors.
- Craft Scissors
- Glue Gun* (not pictured) | This is optional. You’ll only need this if you want to glue something to your mesh like I did with Poppy.
Now, let’s get into the fun part, how to make the wreath!
INSTRUCTIONS
First, cut all your deco mesh, and ribbon, pieces.
You’ll need 6″ deco mesh pieces (long enough to roll into a complete cylinder). I used a hack since I didn’t have a rotary cutter.
The Hack: Cut a 6″ piece of cardboard. Then, wrap your roll of deco mesh around it about 6 or 7 times. Use the scissors to cut the mesh at each of the cardboard. Repeat the process until you’ve cut all of your deco mesh.
Using a rotary cutter will make this process easier. It’ll also keep the ends of the deco mesh from fraying. If you do decide to use scissors, you can trim the ends later. We’ll talk about that below.
You’ll also need 6″ ribbon strips. I like the dovetail look for the ends of the ribbon. Cutting straight across works well, too.

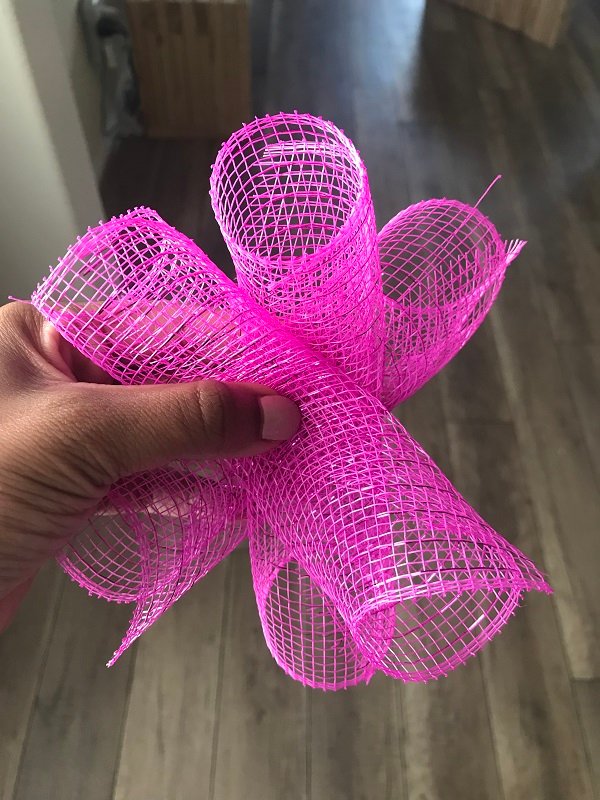
Next, assemble your mesh bundles.
Each bundle will consist of 3 rolled cylinders of mesh, 1 or 2 strips of ribbon, and a chenille stem to hold everything in place.
Start with one piece of mesh, roll it into a cylinder, and pinch it in the middle to keep it from unraveling.

Now, roll 2 more, one at a time. They should look like this…
Once you’ve finished that, you’re ready to add your ribbon. Cross your ribbon over your mesh in the shape of a lowercase “t”.
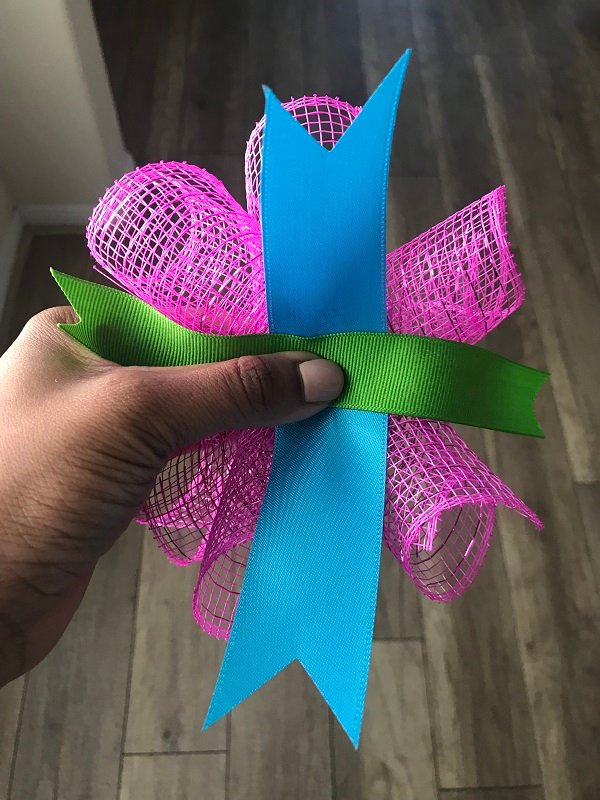
Secure the bundle with a chenille stem. Lay the chenille stem on top of the bundle, pull it around the back, and give it a few twists.
No worries if your bundle looks wonky, or if you’re able to see the chenille stem. You’ll fix that later.


Continue to make bundles until you have enough to complete your wreath.
For reference, I made 42 bundles for a 14-inch wreath form.
Once the bundles are done, you’re ready to attach them to your wreath form.
Looking at the wreath frame, from the inside out, you have your inner ring, second ring, third ring, and your outer ring. You’ll begin attaching chenille stems around the second, and third, rings.
Or, said another way, put one side of the chenille stem between rings 1 & 2, and the other side between rings 3 & 4.

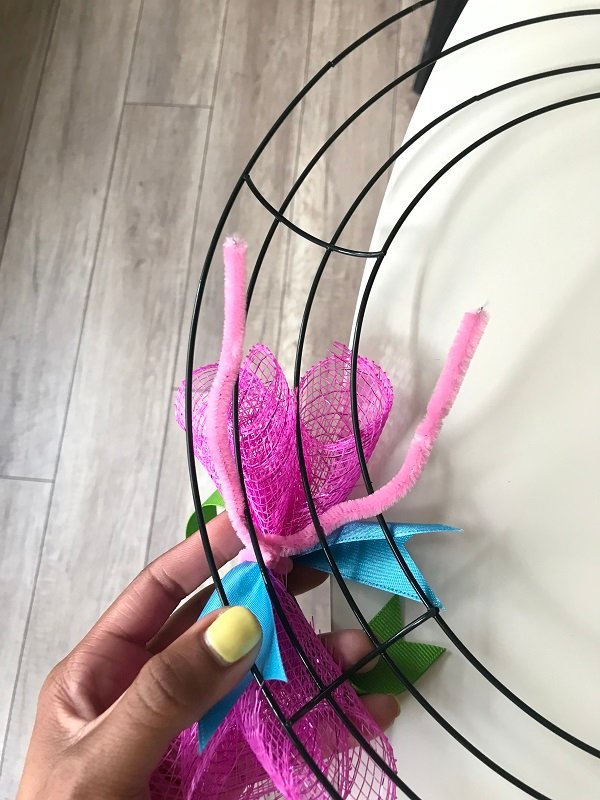
Now, you’ll cross both sides…
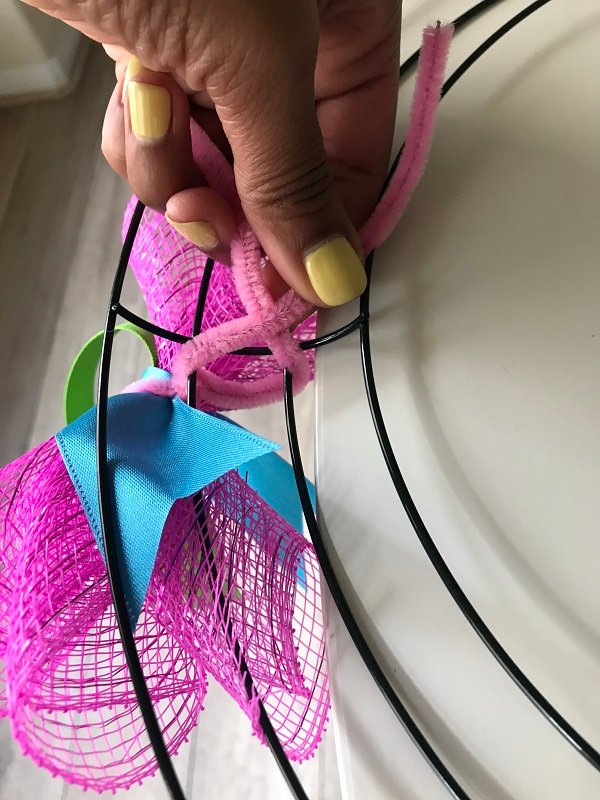
And twist three times to secure your bundle to the wreath ring.
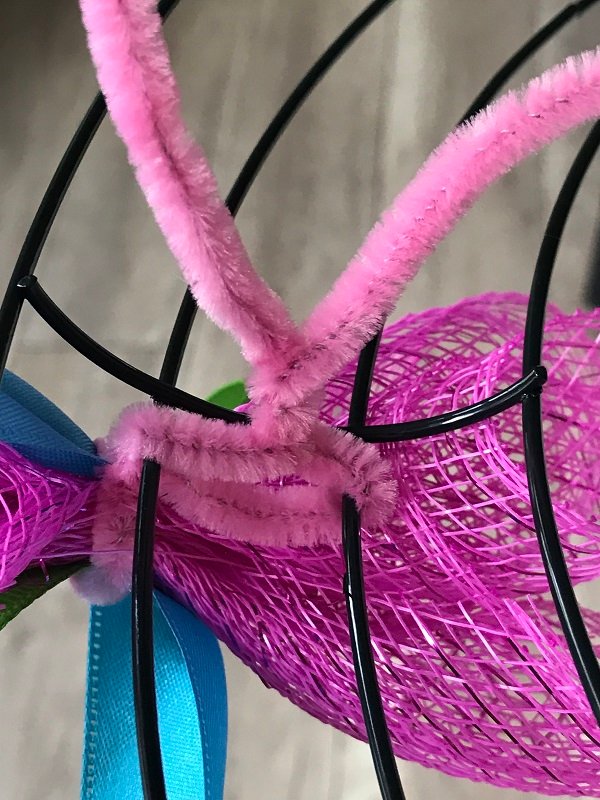
Push the bundle to the top of the section to make room for the others. Keep adding bundles to that section until it reaches the fullness you desire.
Here’s what the back of the wreath should look like…
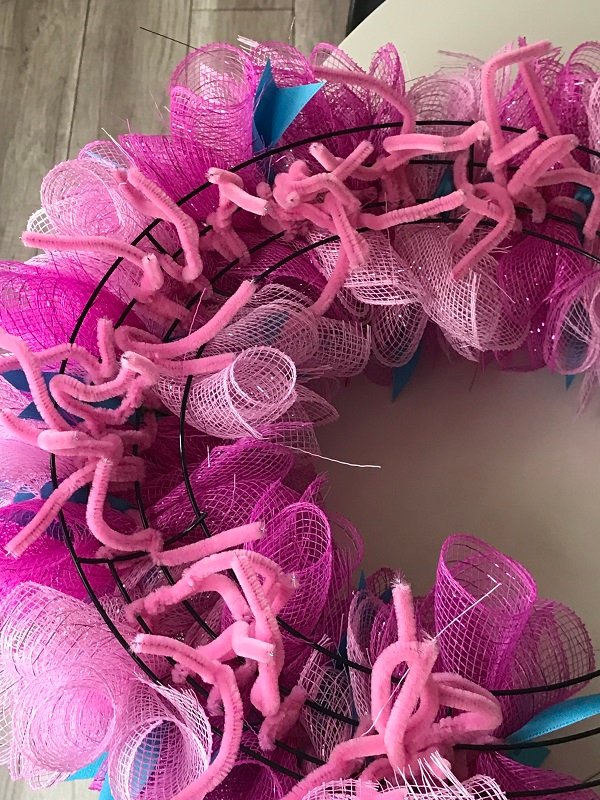
Keep going until you’ve attached all of your bundles to the wreath frame.
A Few More Things
- Once that’s done, turn your wreath to the front and give it a good scrunch and fluff. This is the step that hides the chenille stems, so scrunch and fluff well.
- Now, tuck those wild chenille stems in the back of the wreath by twisting them around each other to get them as flat as possible.
- If you used scissors on your deco mesh, it’s time to give those loose strings a good trim. This step is optional, of course. Skip this step if you already like the way it looks.
For Attachments
If you’re going to add something else to your wreath, like I did with Poppy, make sure you complete all of the steps above before you do so.
A good rule of thumb is to be certain you know precisely where you’re going to place your object before you whip out your hot glue gun and start gluing. Even if you think you know where you want to put your item, try out different positions around your wreath to be sure – high, low, to the left, to the right, etc.
Another question you’ll want to think about, depending on what you’re attaching, is – where do I want this to sit on the mesh, on top, in between layers, etc.?
If you look closely at Poppy, you’ll see that she is positioned between mesh layers. That’s because I had to glue her shoes into the mesh since it was the only way I keep her in place without her falling out.
Once you’ve figured that out, start with a little glue, and add more as needed. You want the item to be secure.
Wrapping It Up
So, there you have it guys, instructions for making your very own spiral deco mesh wreath.
Let your imagination run wild as you choose your colors and themes, like Fall, Halloween, or Christmas. And most of all: have fun!
All the Best,
♥ Ash
P.S. Not ready to make one just yet? Take a look at these –